
Steelhead
Learn to Cure Steelhead Eggs – For All Conditions

By: Duane Inglin
It hasn’t been a traditional winter steelhead season in the Pacific Northwest. Meanwhile, I mean that in a good way. Fishing has been lights out. There’s a lot of hatchery fish available. Many are larger than average.
Part of the success this season can be attributed to ideal and stable conditions. We had a series of extreme high-water events early this season. Since then it’s been cold with minimal precipitation. This has given us high water on the drop, creating ideal green water at a perfect flow. On the other hand, our rivers will continue to drop and soon be gin clear and extremely low.
Typically, we face highs and lows as it relates to water levels. This also brings varying water color. Dirty water (or water with color) vs. water with extreme clarity fishes differently. There’s also everything in between. This usually requires eggs of different colors to accommodate different conditions. Or does it?
Not all anglers have an abundance of eggs which would allowing you to cure several skeins of eggs different colors. Dark red will work well in dirty water. Pink is fantastic in green or clear water and orange or natural is perfect for clear water. UV is also another important consideration especially for steelhead as they are so visually stimulated.
Is it possible to create eggs that will fish well in all conditions? Yes. However, it requires a two-step curing process that gives you eggs that can be fished in any condition. These eggs have strong UV properties and fish well in high and dirty water and extreme low and clear water.
Creating the Ultimate Steelhead Egg For All Conditions
- Overview: The One-Two Punch
This is a one-two punch in curing. You’ll start with Chartreuse Fire Brine mixed with Natural BorX O Fire. This will be the initial cure that adds a tremendous amount of UV to your eggs. Phase two will require Pink BorX O Fire and Red Nectar. You can also add in some Pink Fire Dye if desired. It seems like a lot, but the results are worth the extra effort.
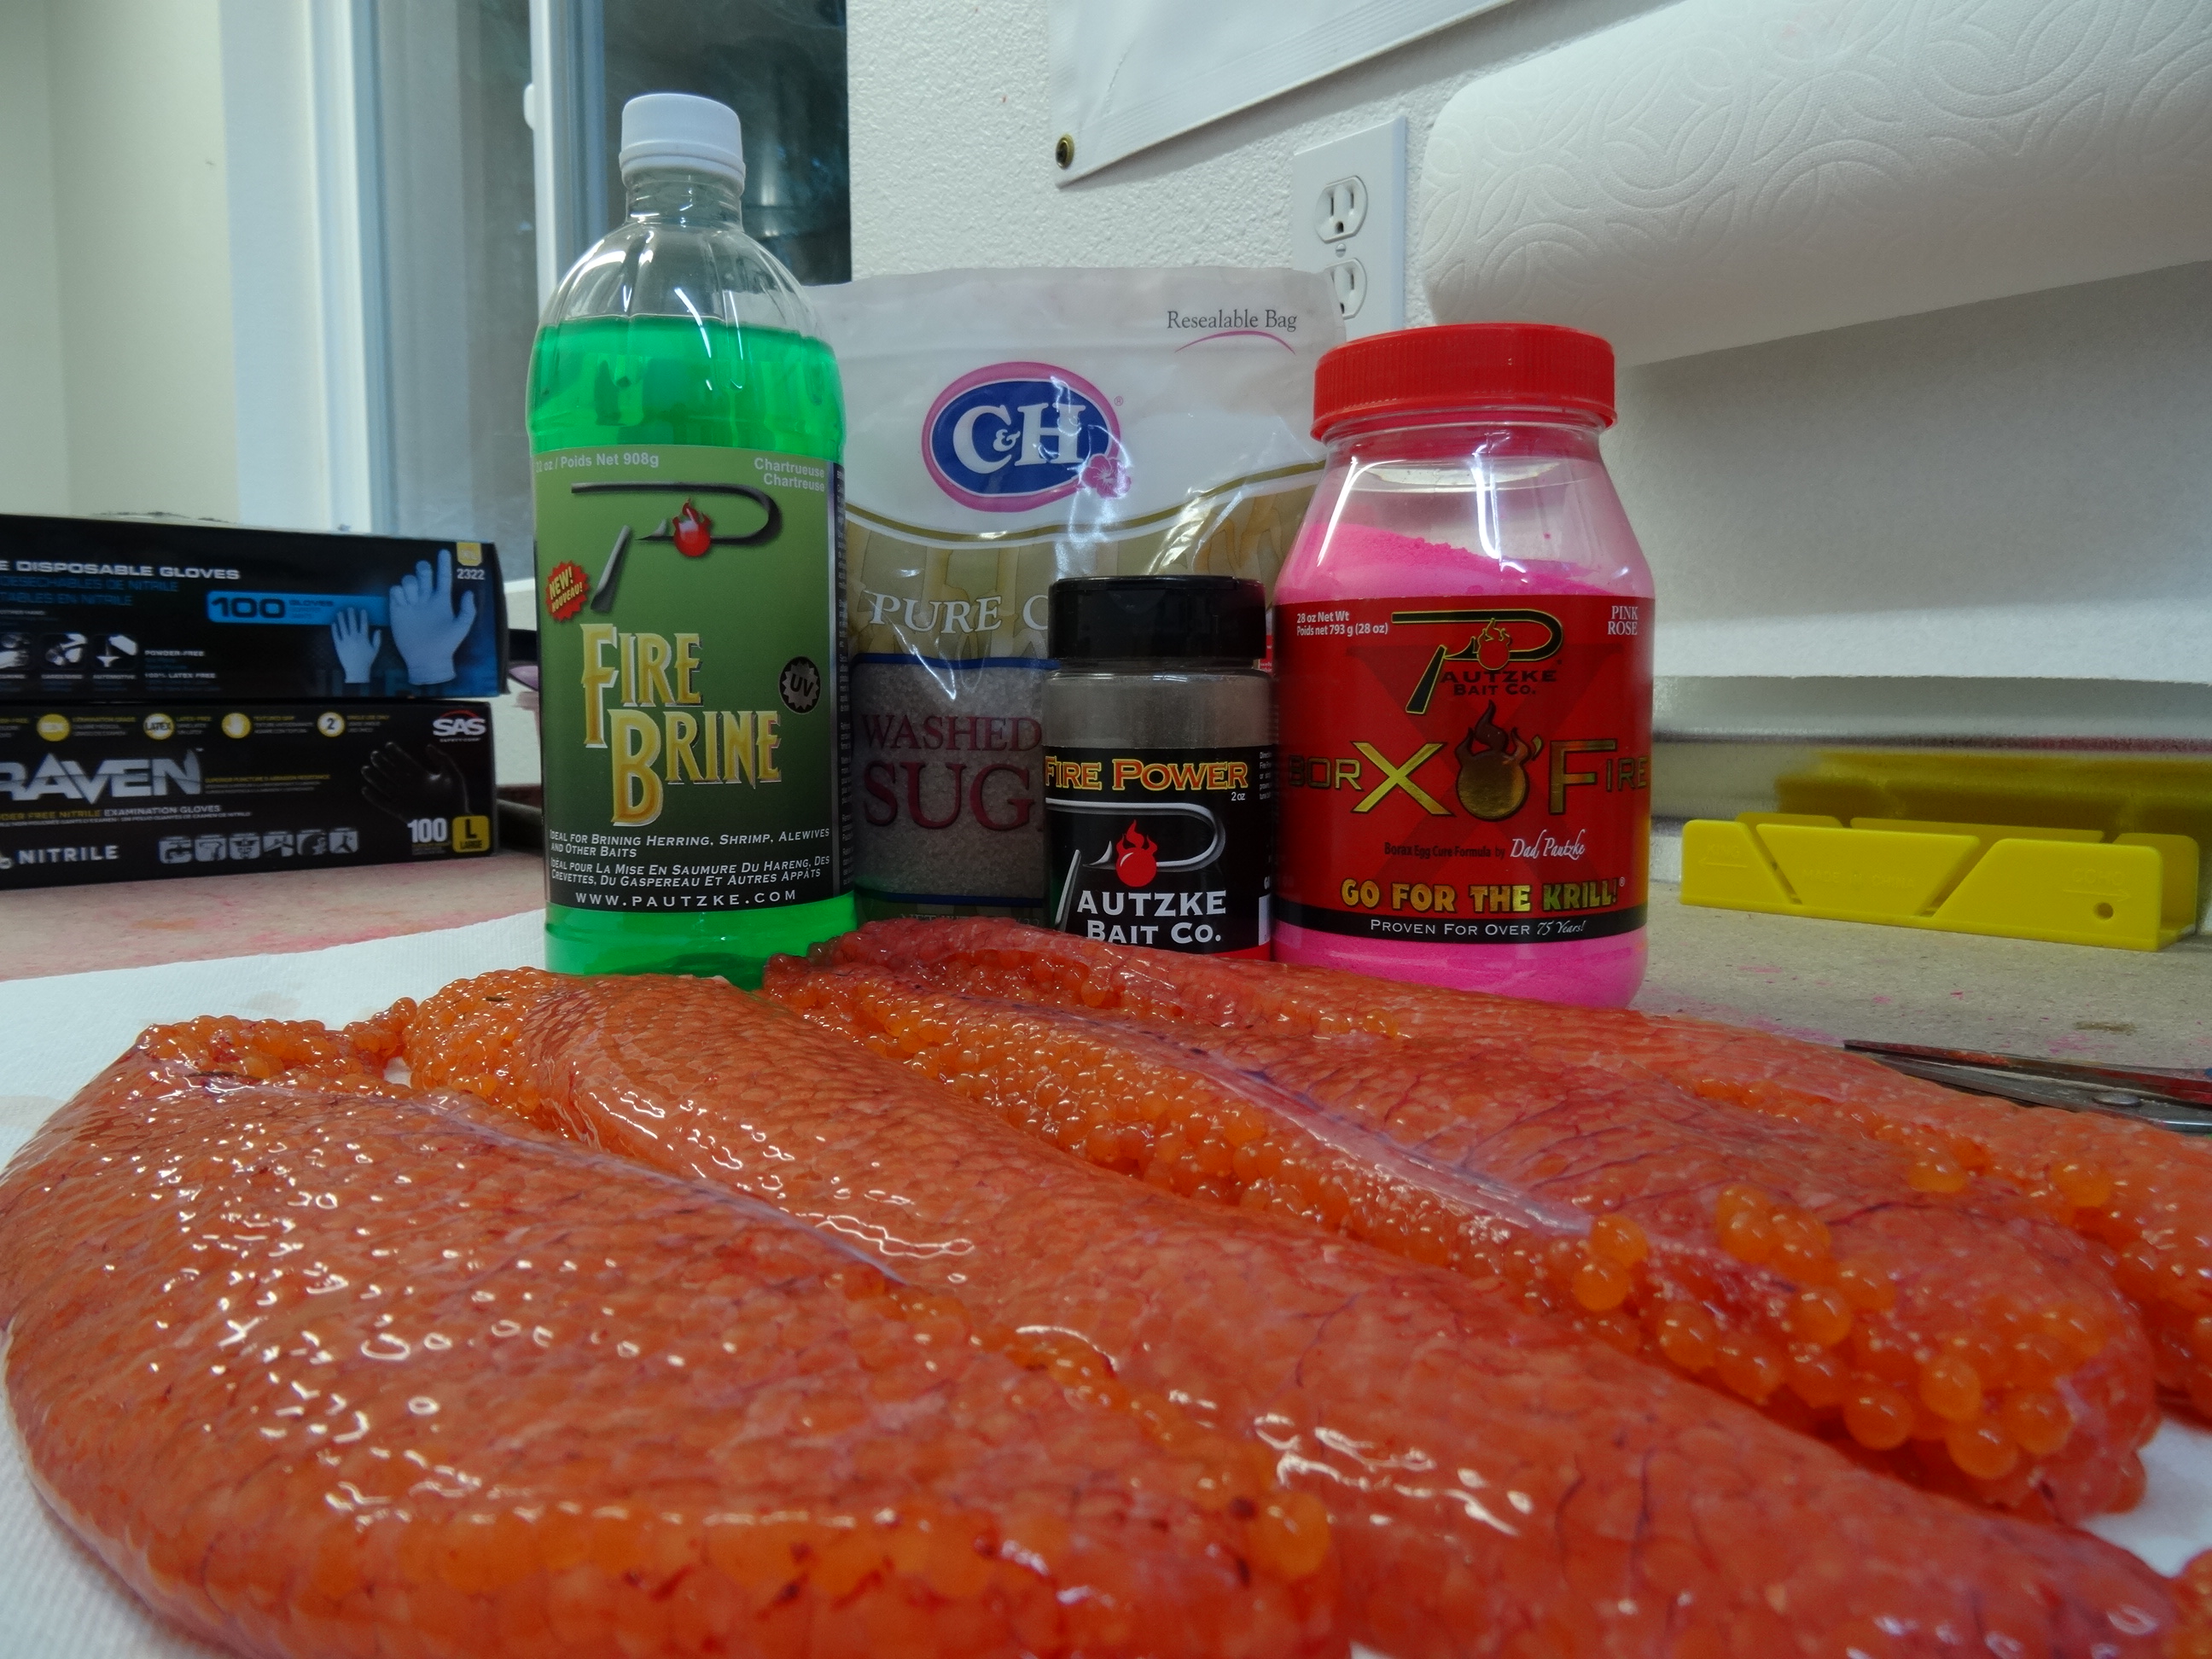
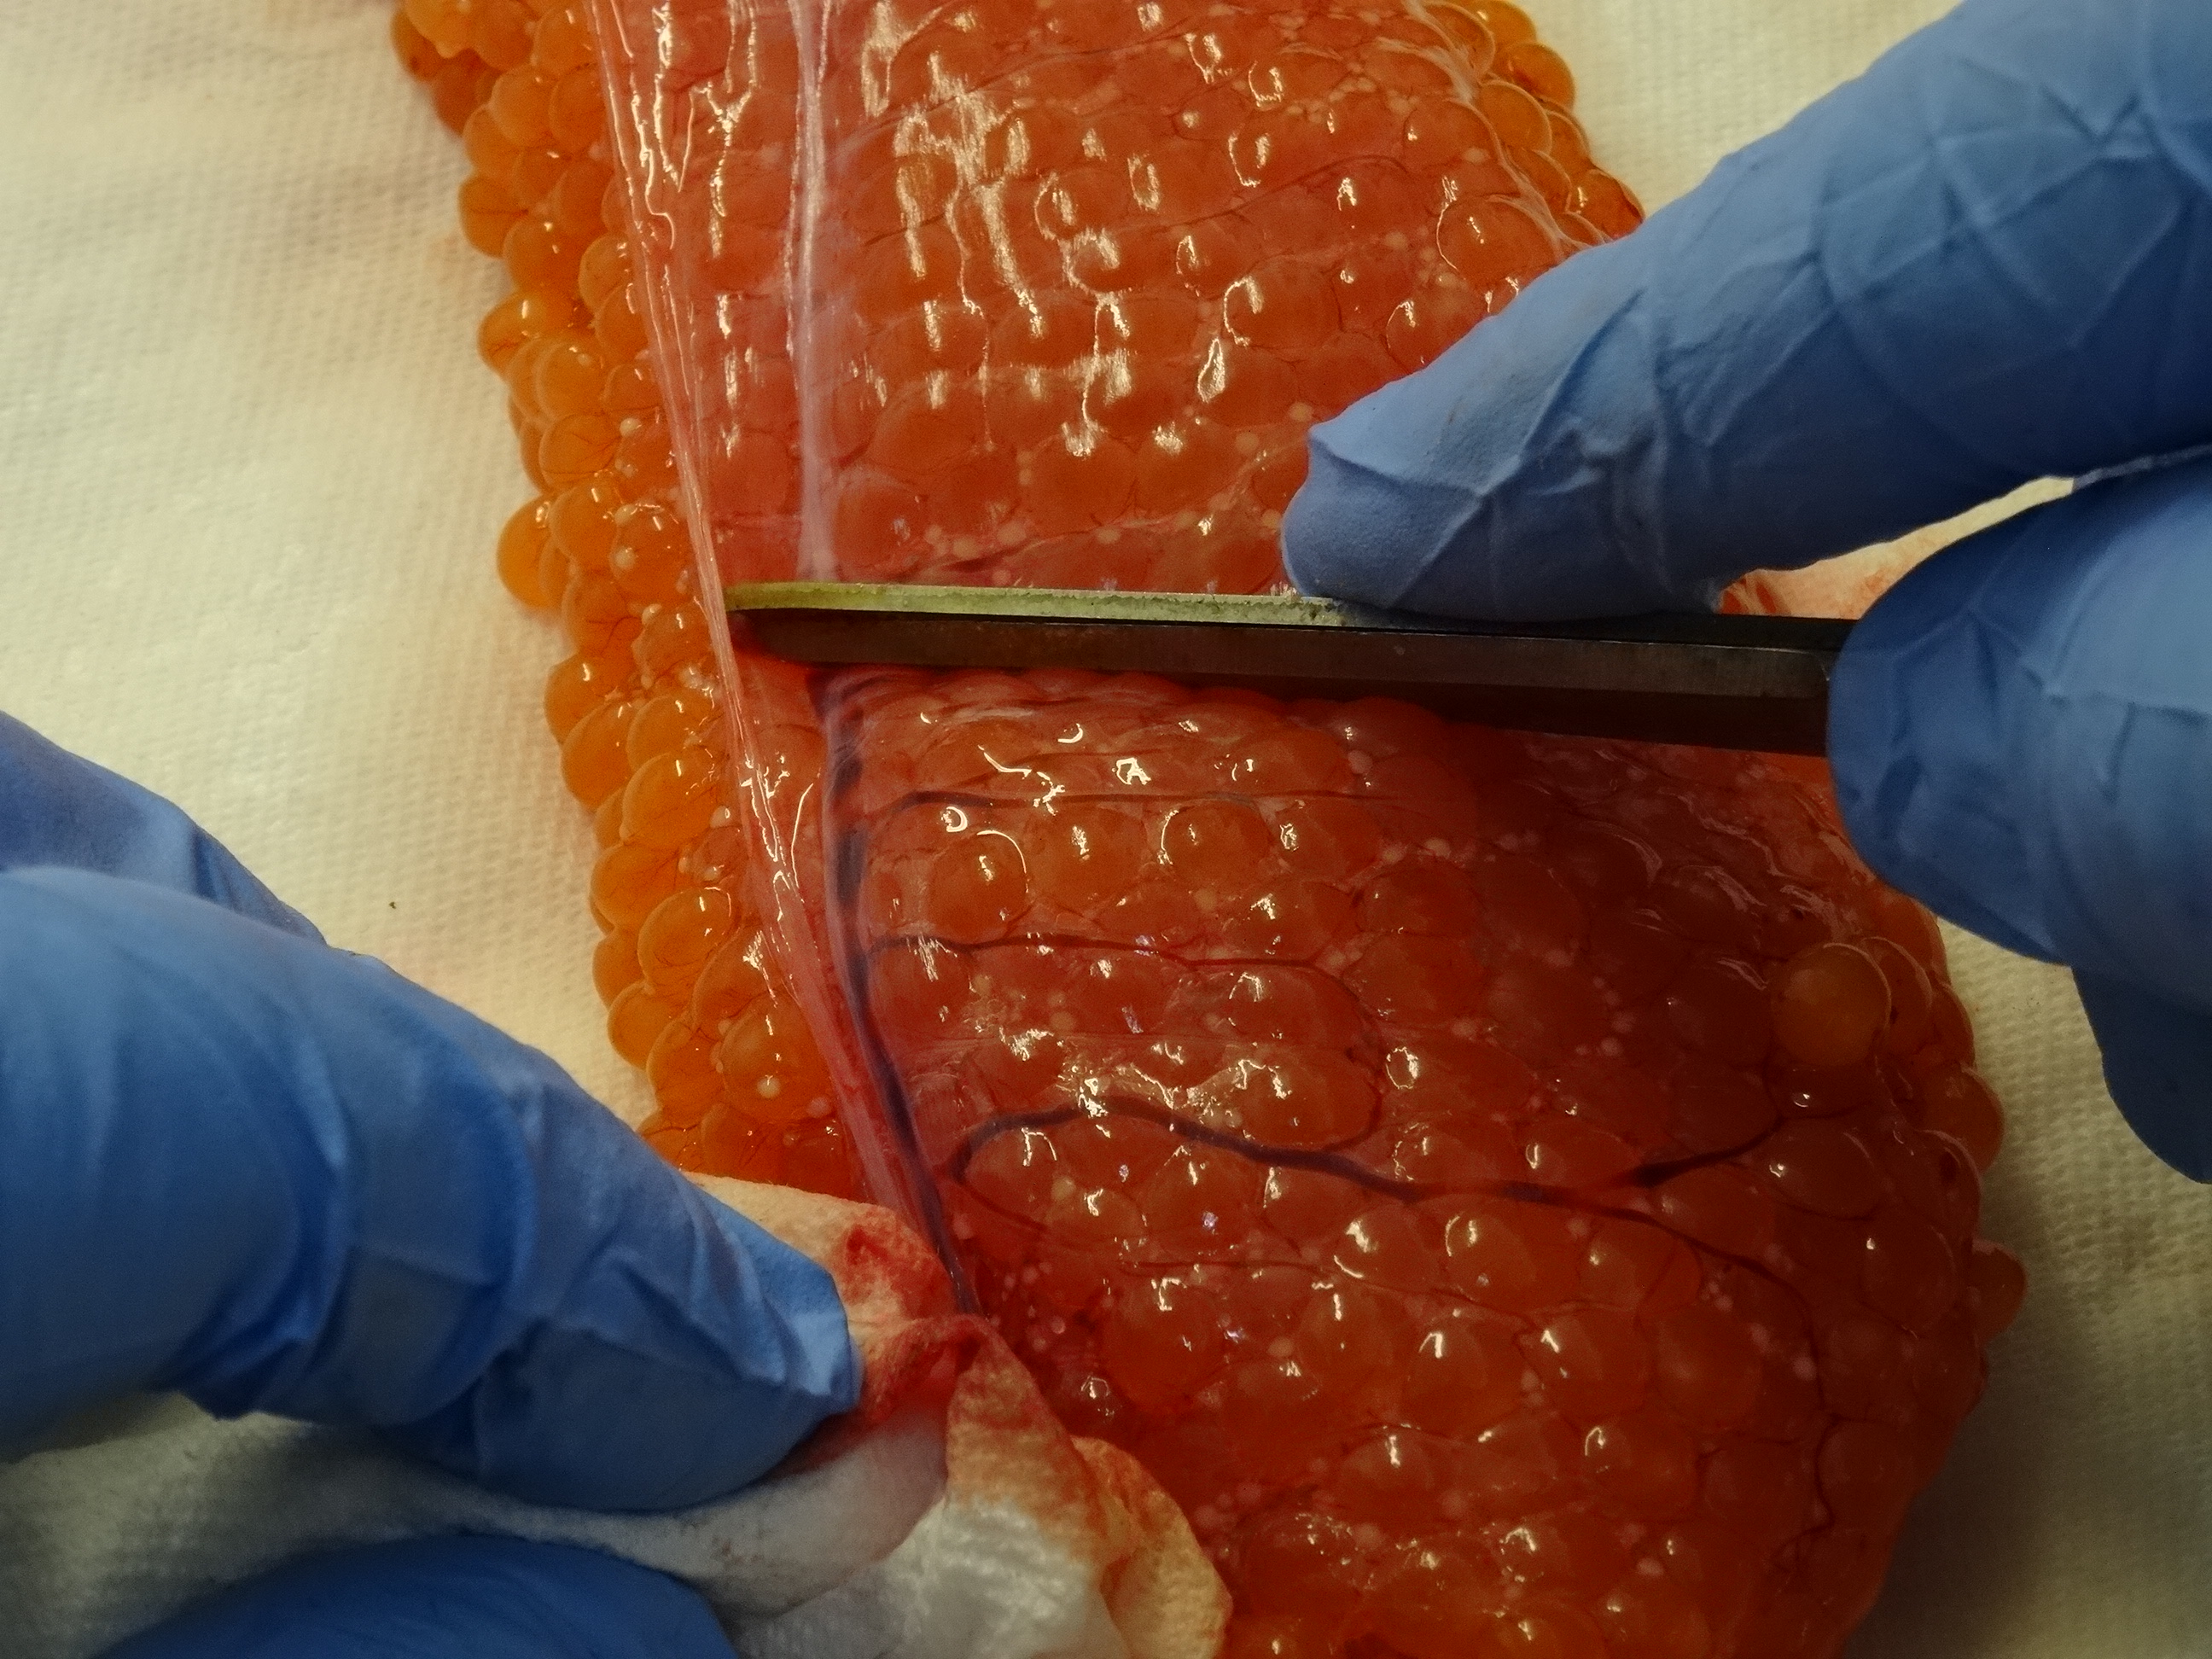
- Remove The Blood
As with all egg curing you need to get all the blood out of your skeins. Using the back side of scissors move the blood along the vein to a small relief cut you have provided at the end of the vein. Using a paper towel, simply blot the blood away from the eggs as it’s pushed out the vein.
- Initial Cure
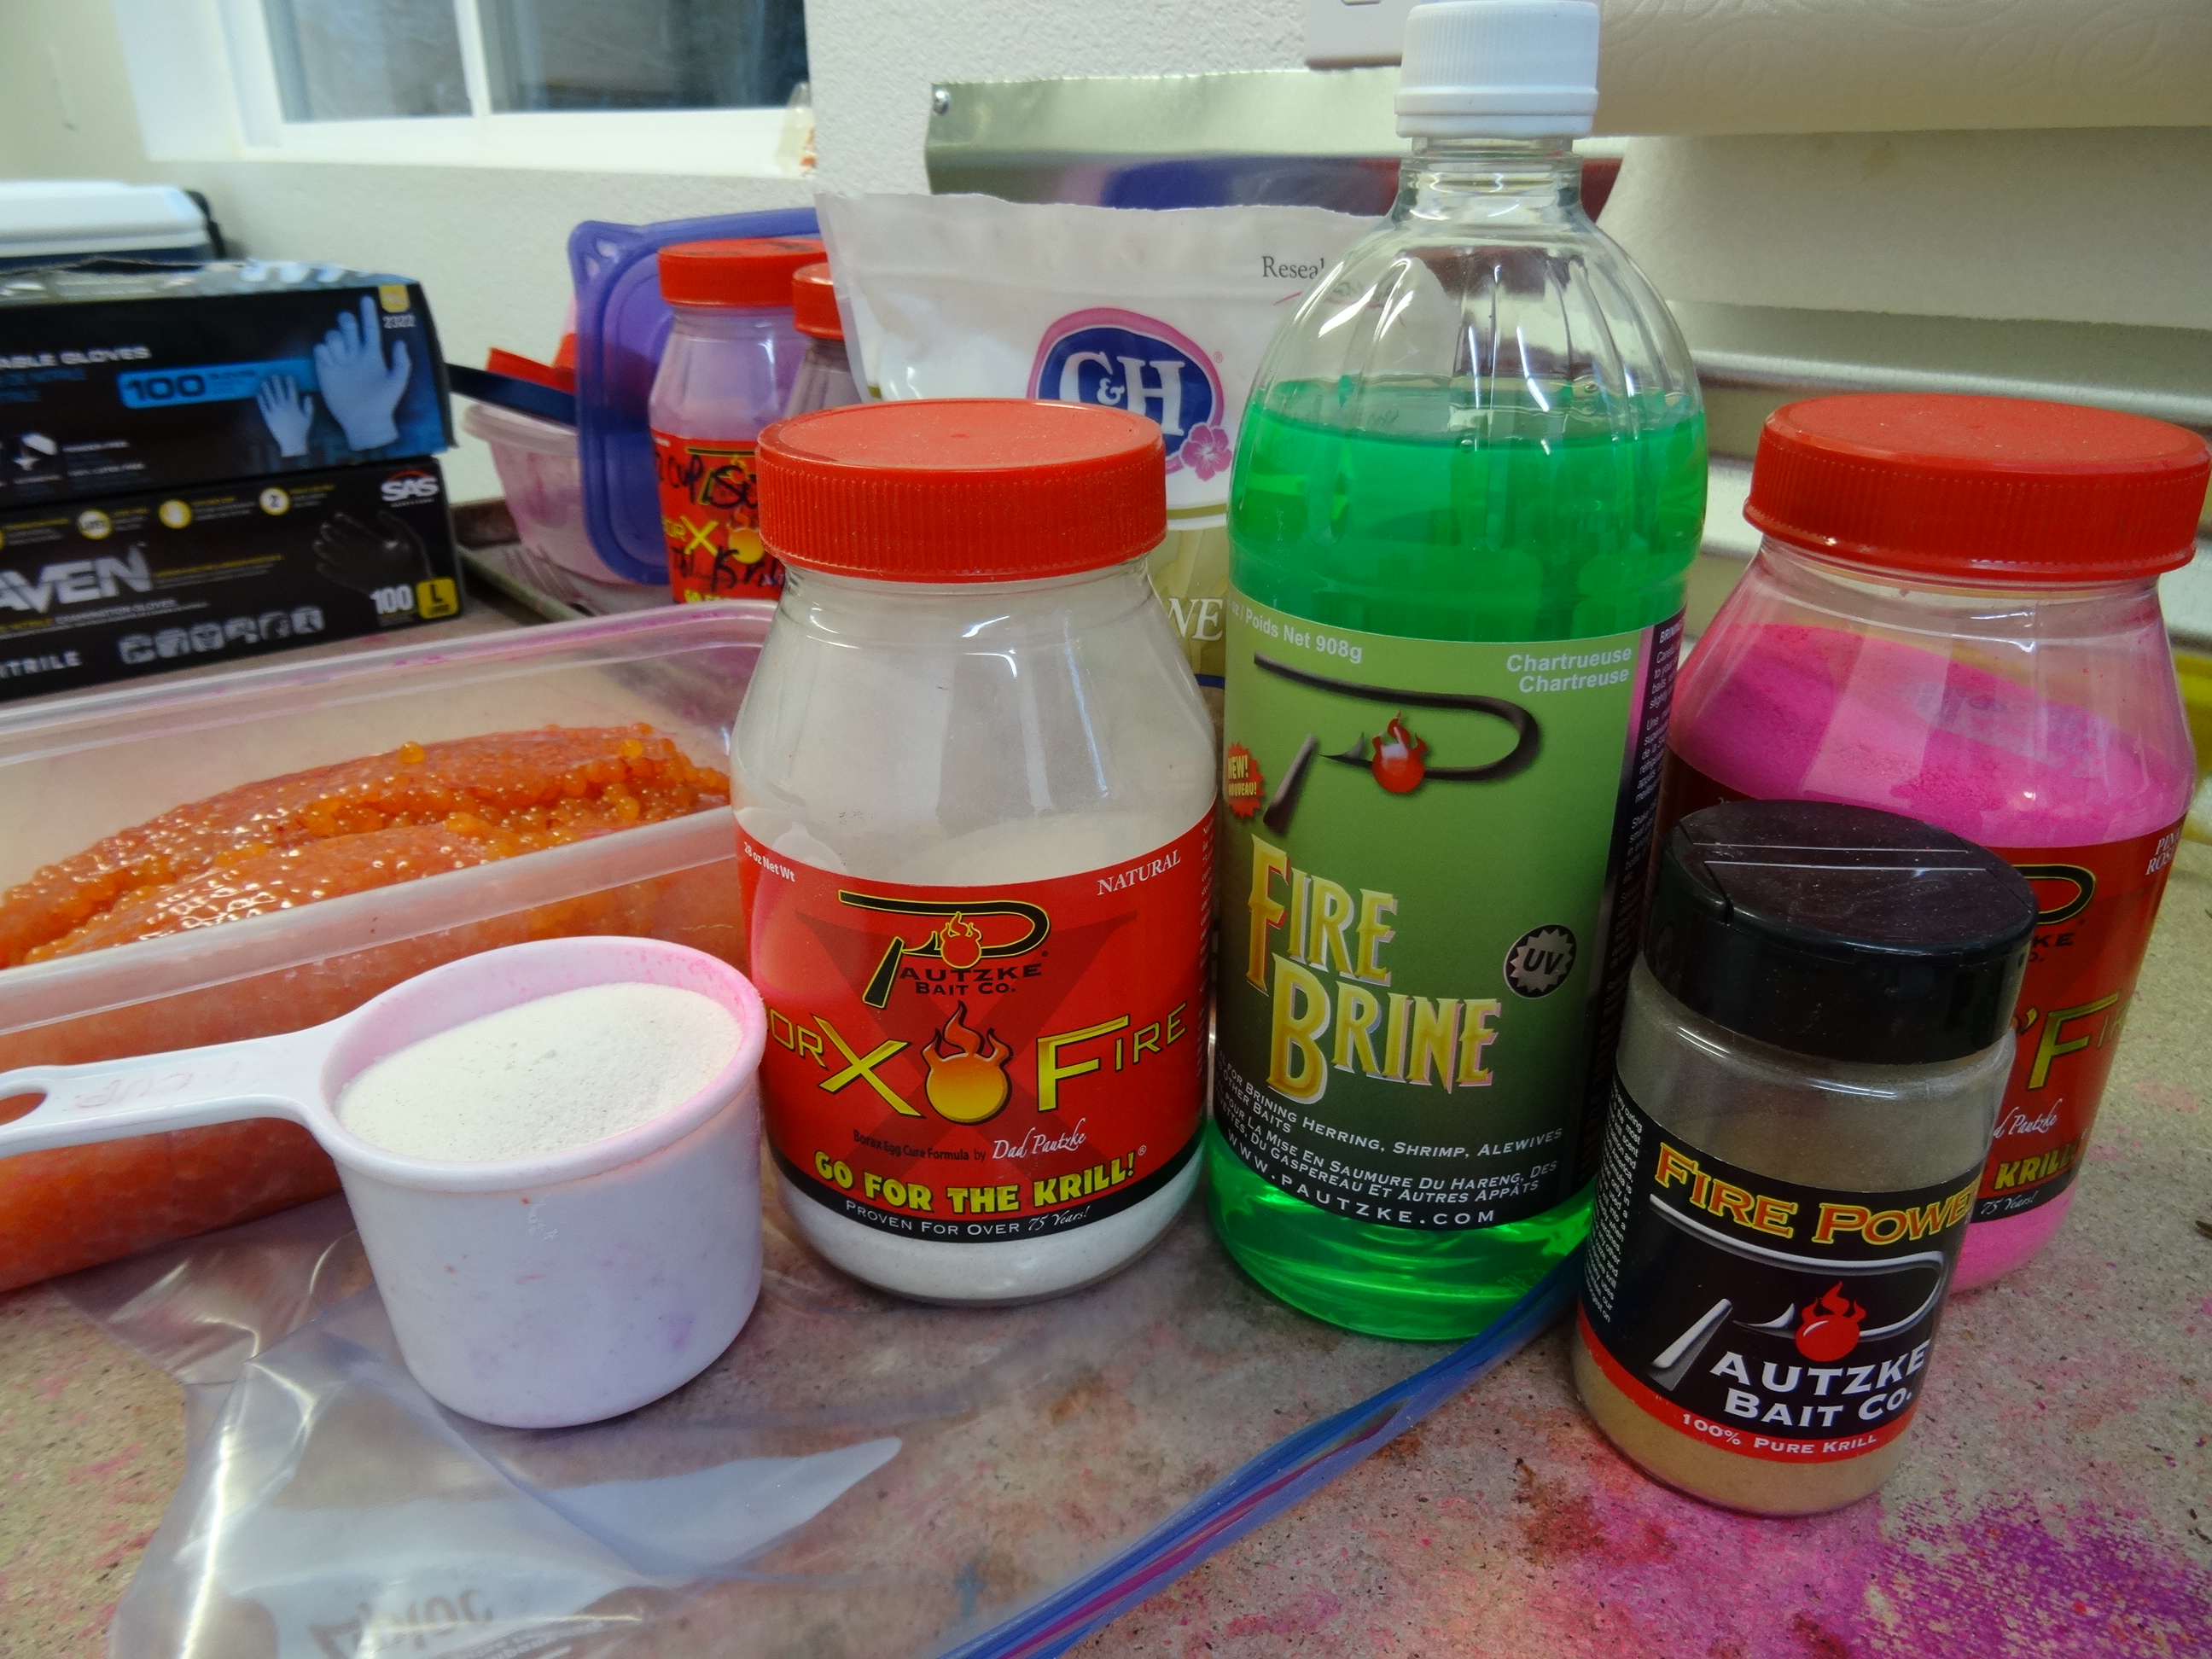
Mix one full bottle of Chartreuse Fire Brine and one cup of Natural BorX O Fire in a gallon Ziploc. This will accommodate up to four nice size steelhead skeins, cut in half crossways. For two skeins you can use a half bottle of Fire Brine and one-half cup of BorX O Fire. Soak the skeins in this mixture up to four hours. Room temperature is best.
- Don’t Forget Sugar
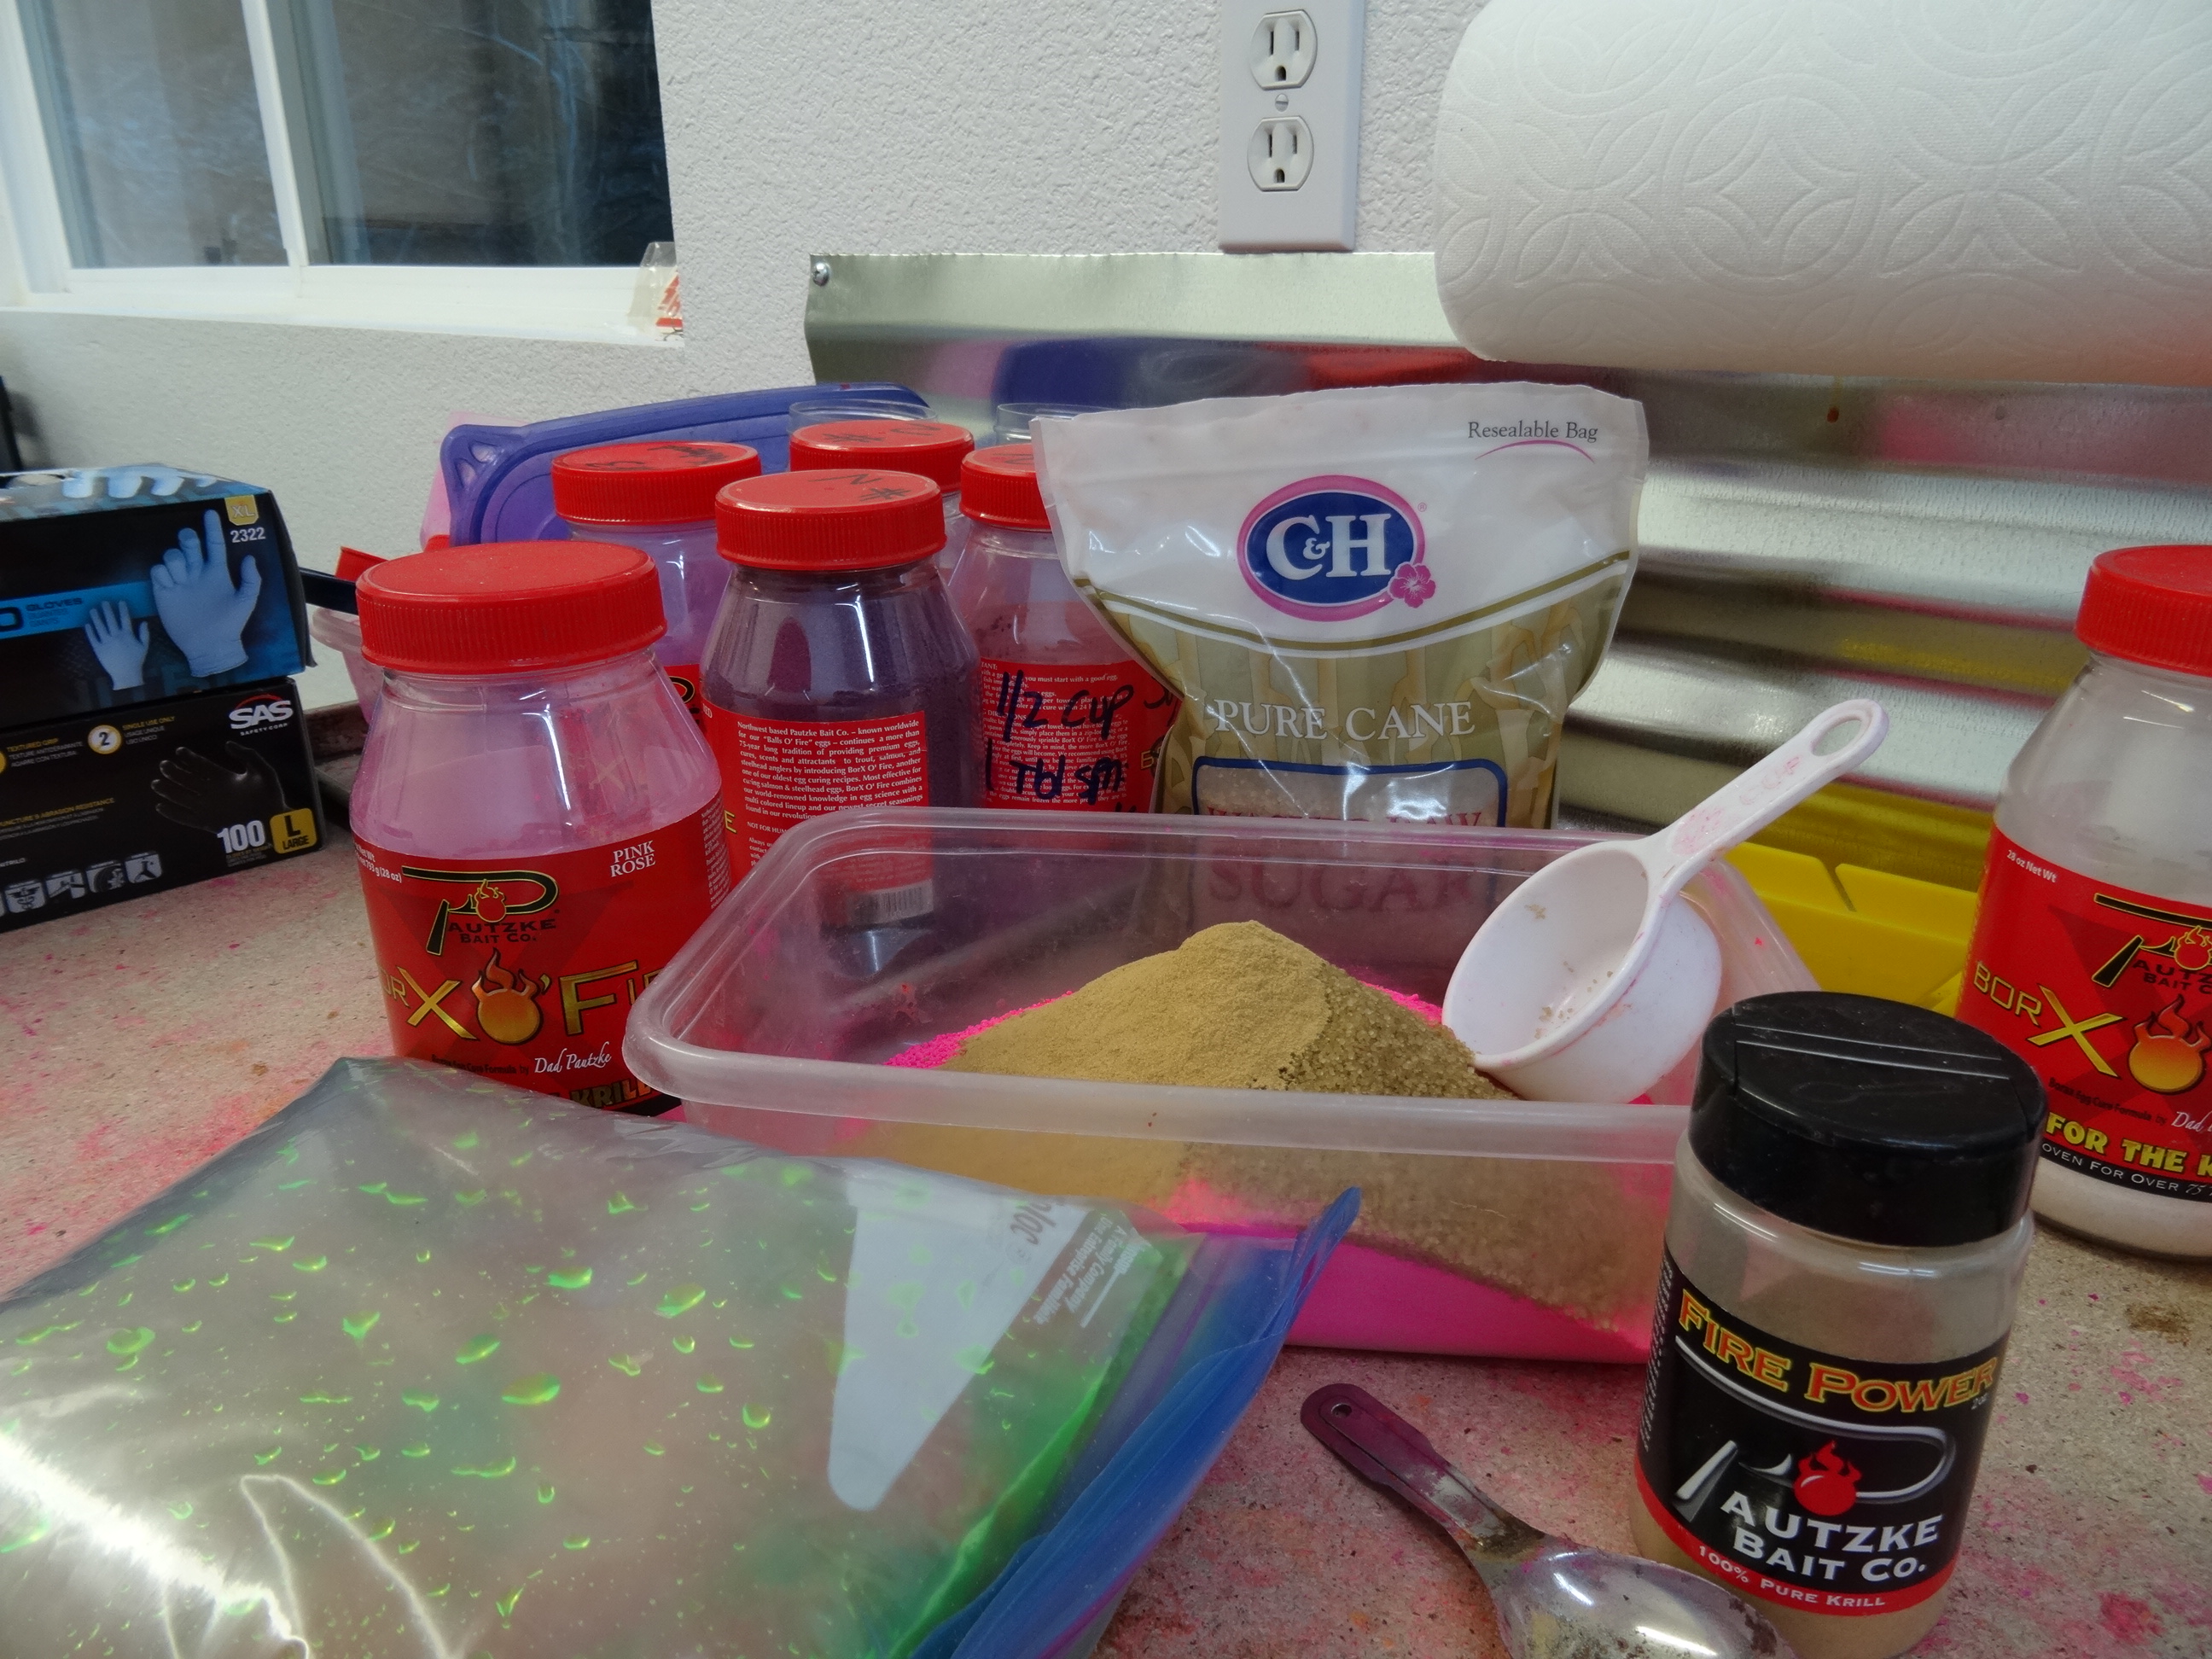
While your egg skeins are in the Fire Brine mix up the second part of the needed ingredients. Here’s what you need to do. Pour one bottle of Pink BorX O Fire and one-half cup of raw washed sugar into a container. If you can’t find it use white refined sugar. I like raw-washed because it’s sweet. Now go ahead and add one-to-three rounded tablespoons of Fire Power (krill powder). Mix the contents thoroughly and set it aside to use later.
- Strain
After four hours remove your eggs from the Fire Brine and strain off the extra liquid for about 30 minutes.
- Paper Towel Time
Place the skeins in a paper towel lined container into the refrigerator for at least 12 hours.

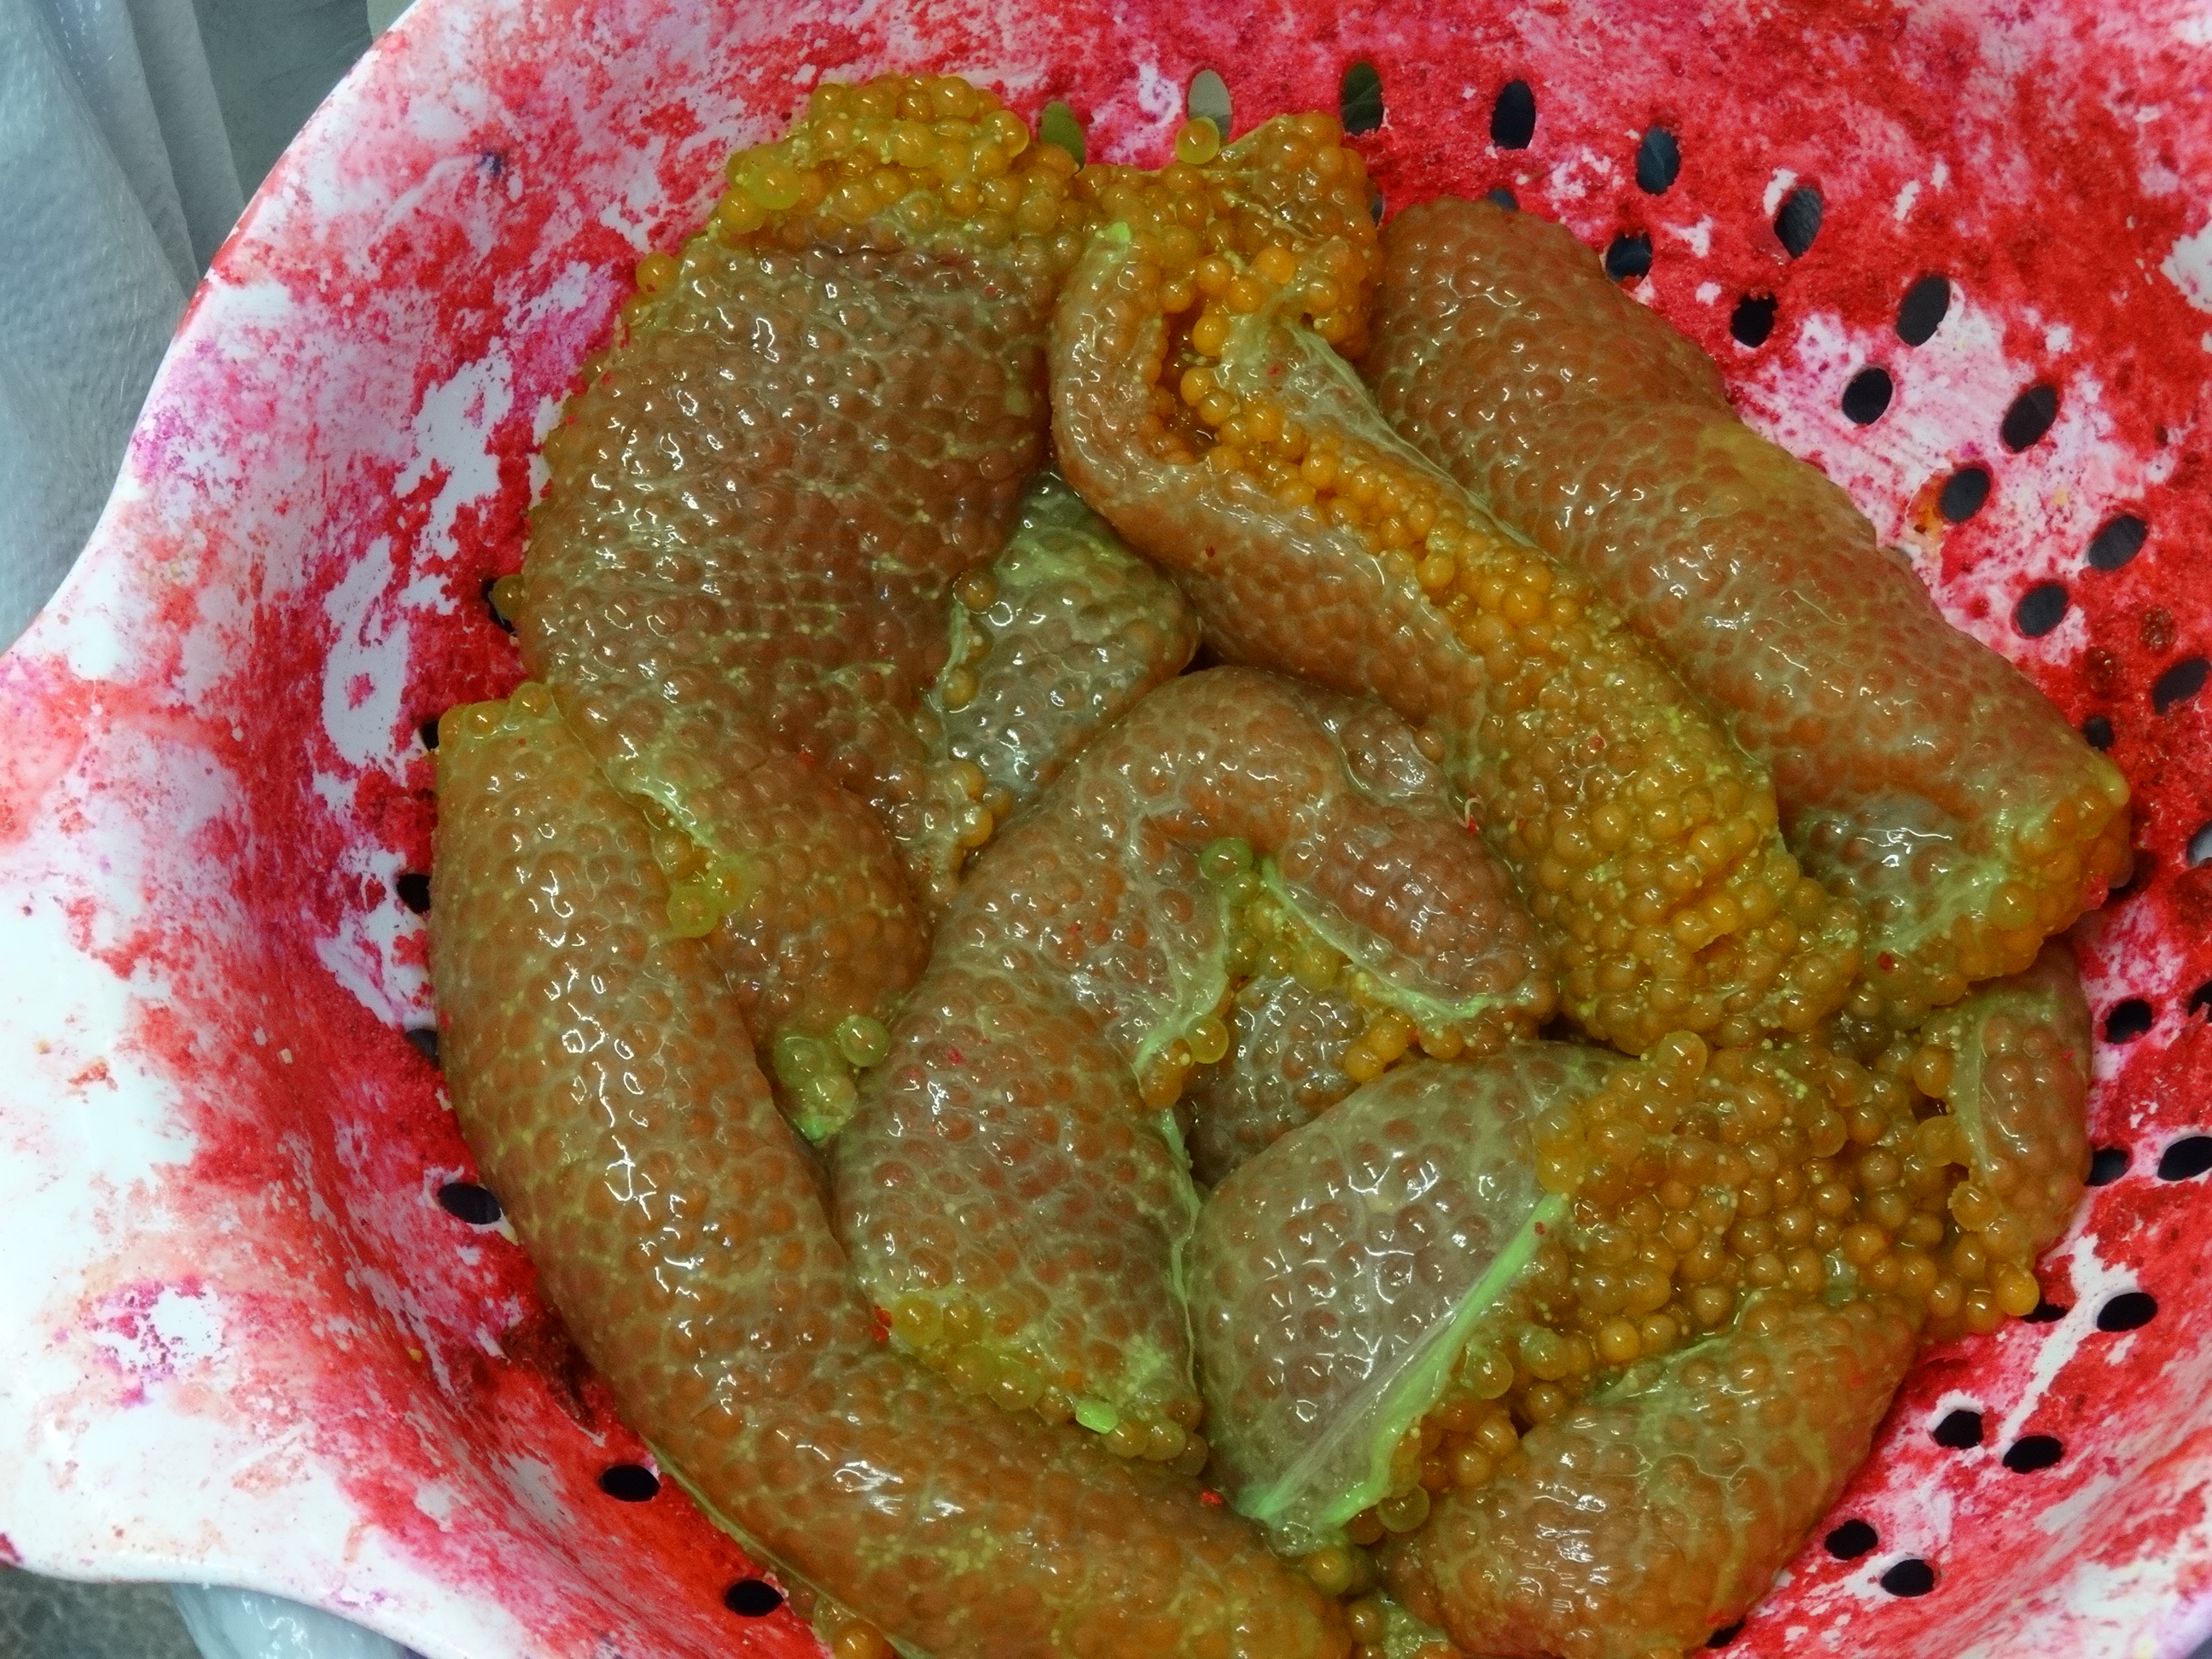
- Lots of UV
The next day, take the skeins out of the refrigerator. You’ll notice that they have a slight light green look to them. Even with a bit of green they actually still look naturally orange. The amount of UV that the eggs have absorbed is amazing.
- Second Cure
Cut the skeins in half, length-wise and lay them out egg side up, skin side down. Sprinkle on sugar-sweetened Pink Rose BorX O Fire. Cover the eggs with a generous amount.

- Add Pure Egg Juice
Place the BorX O Fire covered skeins into a gallon Ziploc and pour in one bottle of Red Nectar. You can use a half bottle if doing only a couple skeins. You can also add some Pink Fire Dye for additional pink color. A tablespoon is enough to get the job done. The red Nectar and sugar sweetened Pink BorX O Fire will add an adequate amount of color to the eggs, but you may want a deeper pink. This is where the Fire Dye makes a difference. Roll all the air out of the bag and seal it. This ensures that all the eggs are surrounded by the pink liquid and cure. Leave the eggs in the bag for at least twelve hours.

- Paper Towels – Part II
Pull the egg skeins from the bag and place them on a paper towel lined container. Place the container in the refrigerator for at least one day. To get the eggs toughened up for durability, simply place the skeins on paper towels egg side down, skin side up. You can place them back into the fridge uncovered for a day or two or in a cool garage on a workbench. You are simply allowing the air to dry out and toughen the eggs a bit.

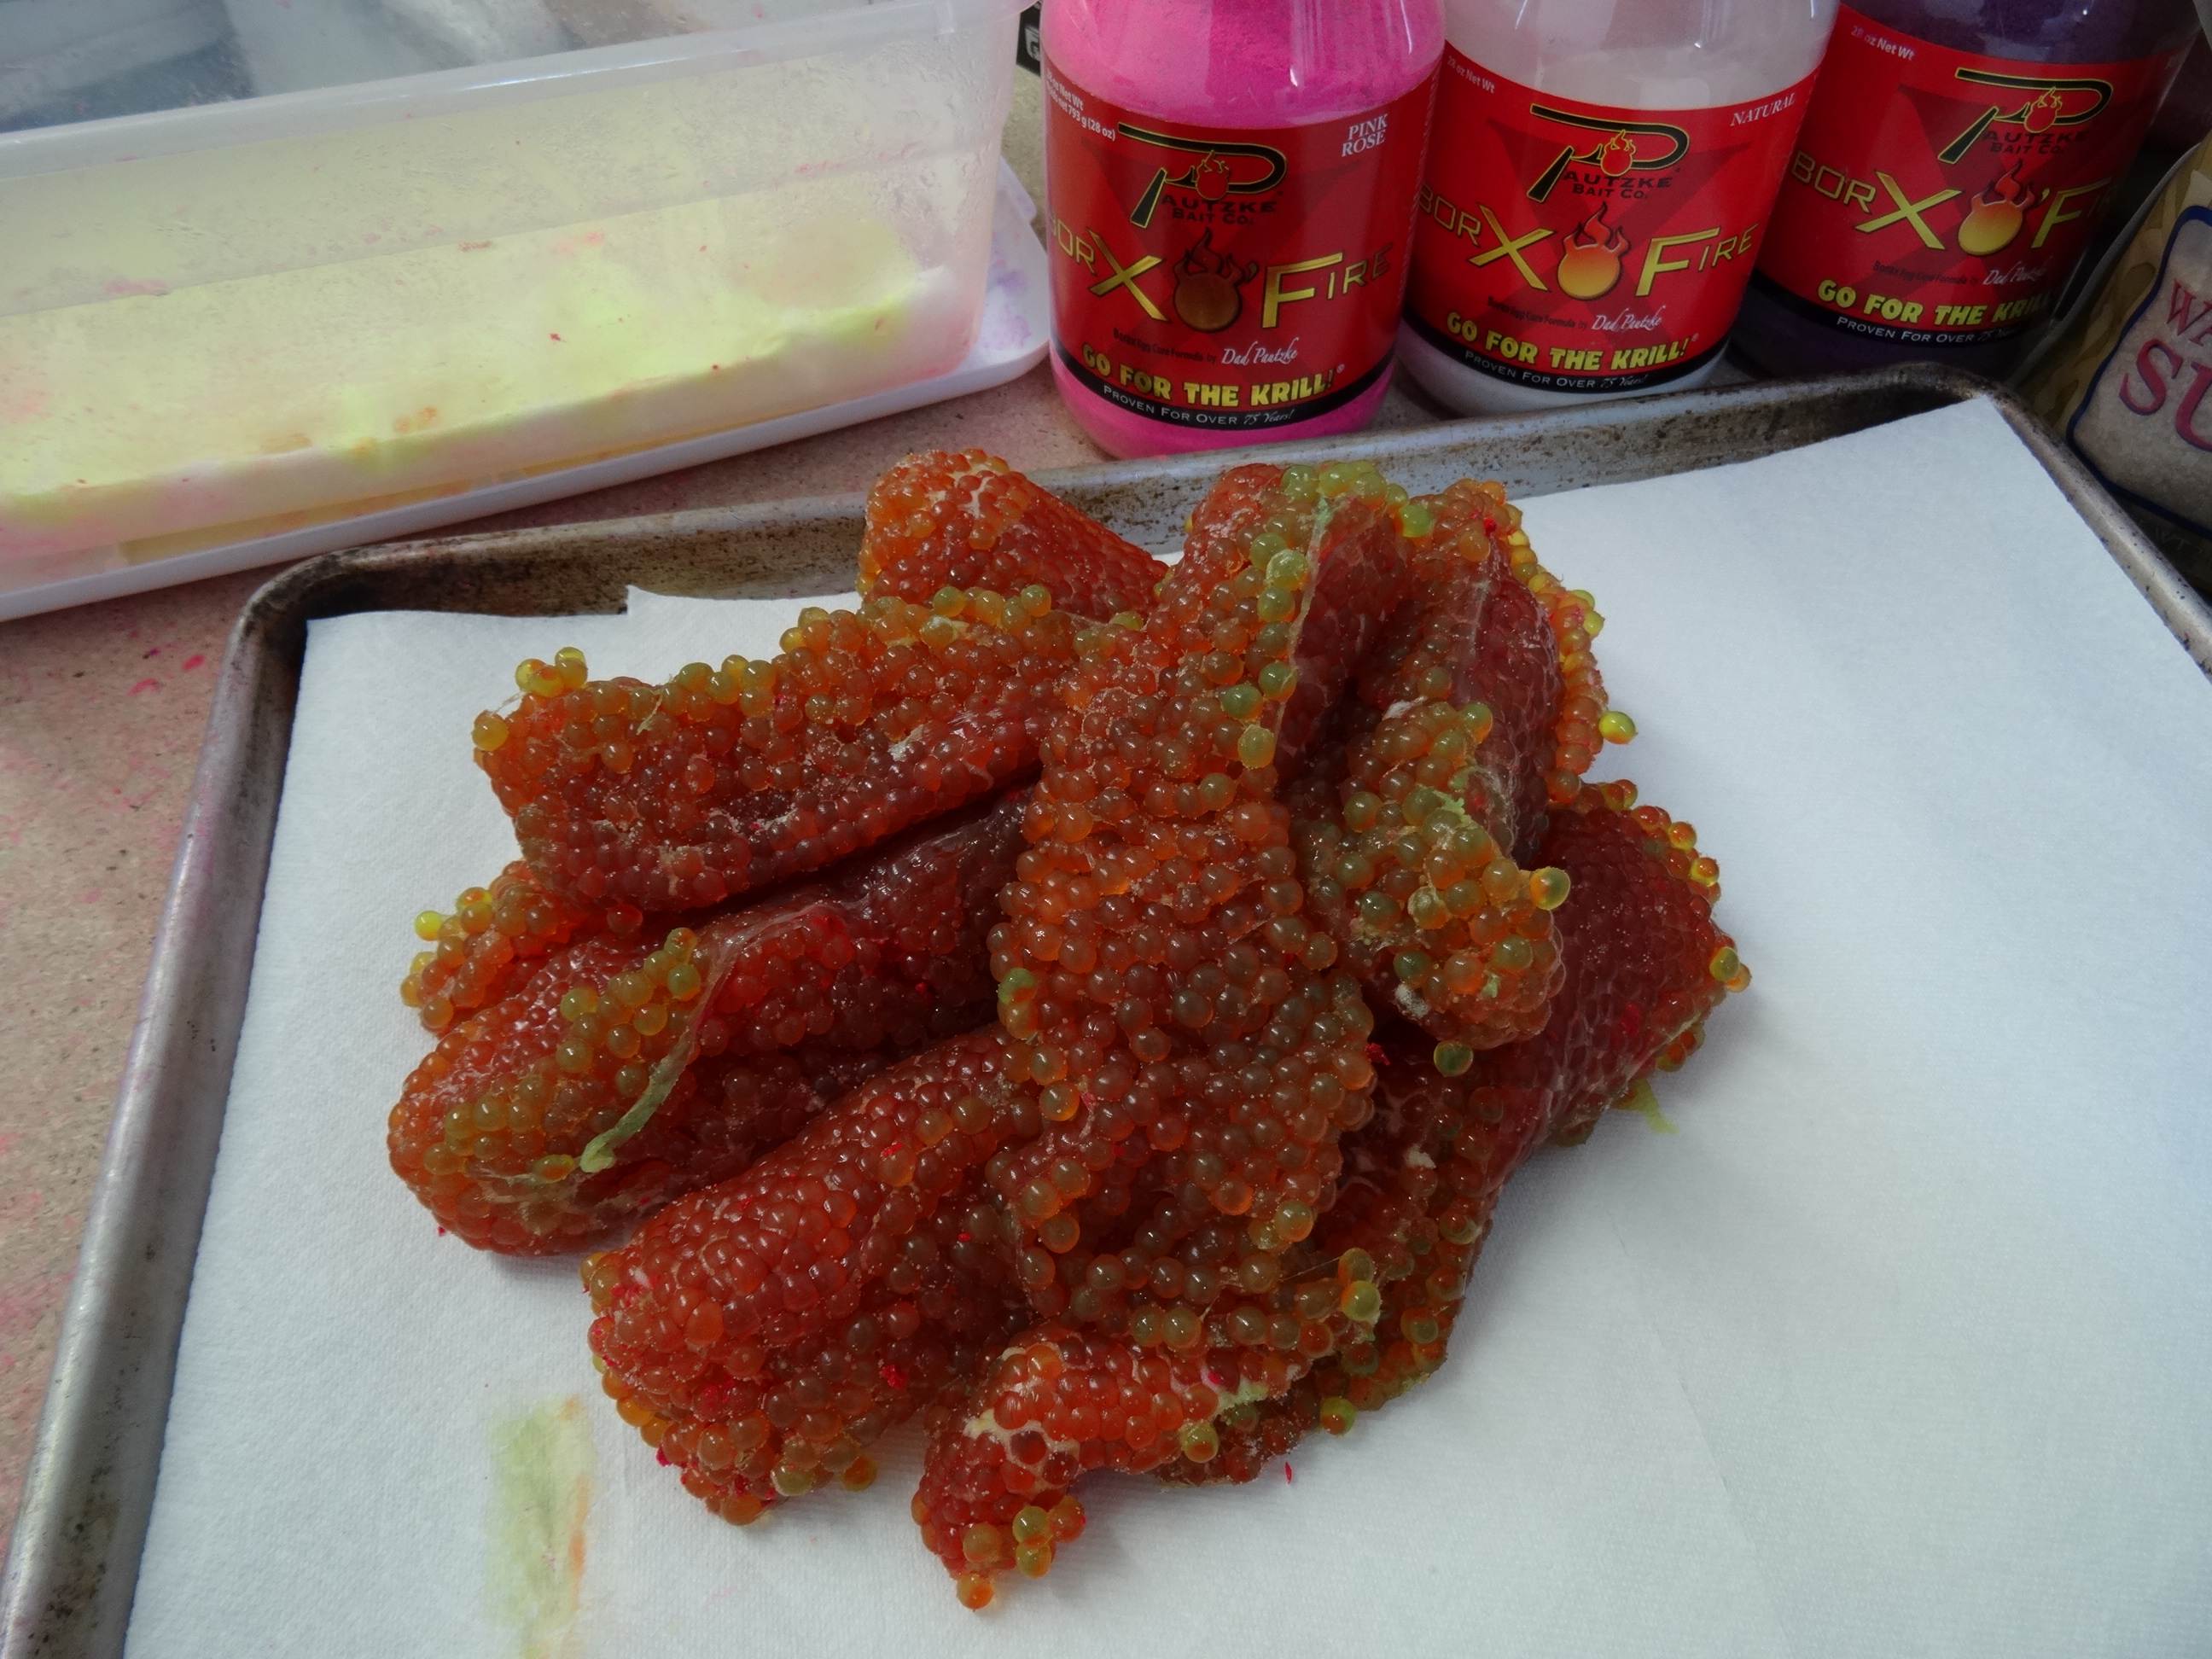
- Check Out These Eggs
The eggs have a pink to light red color now. The original chartreuse and UV is inside the eggs and shows well in off color or dirty water. The pink color in good natural light fishes well in green and clear water.
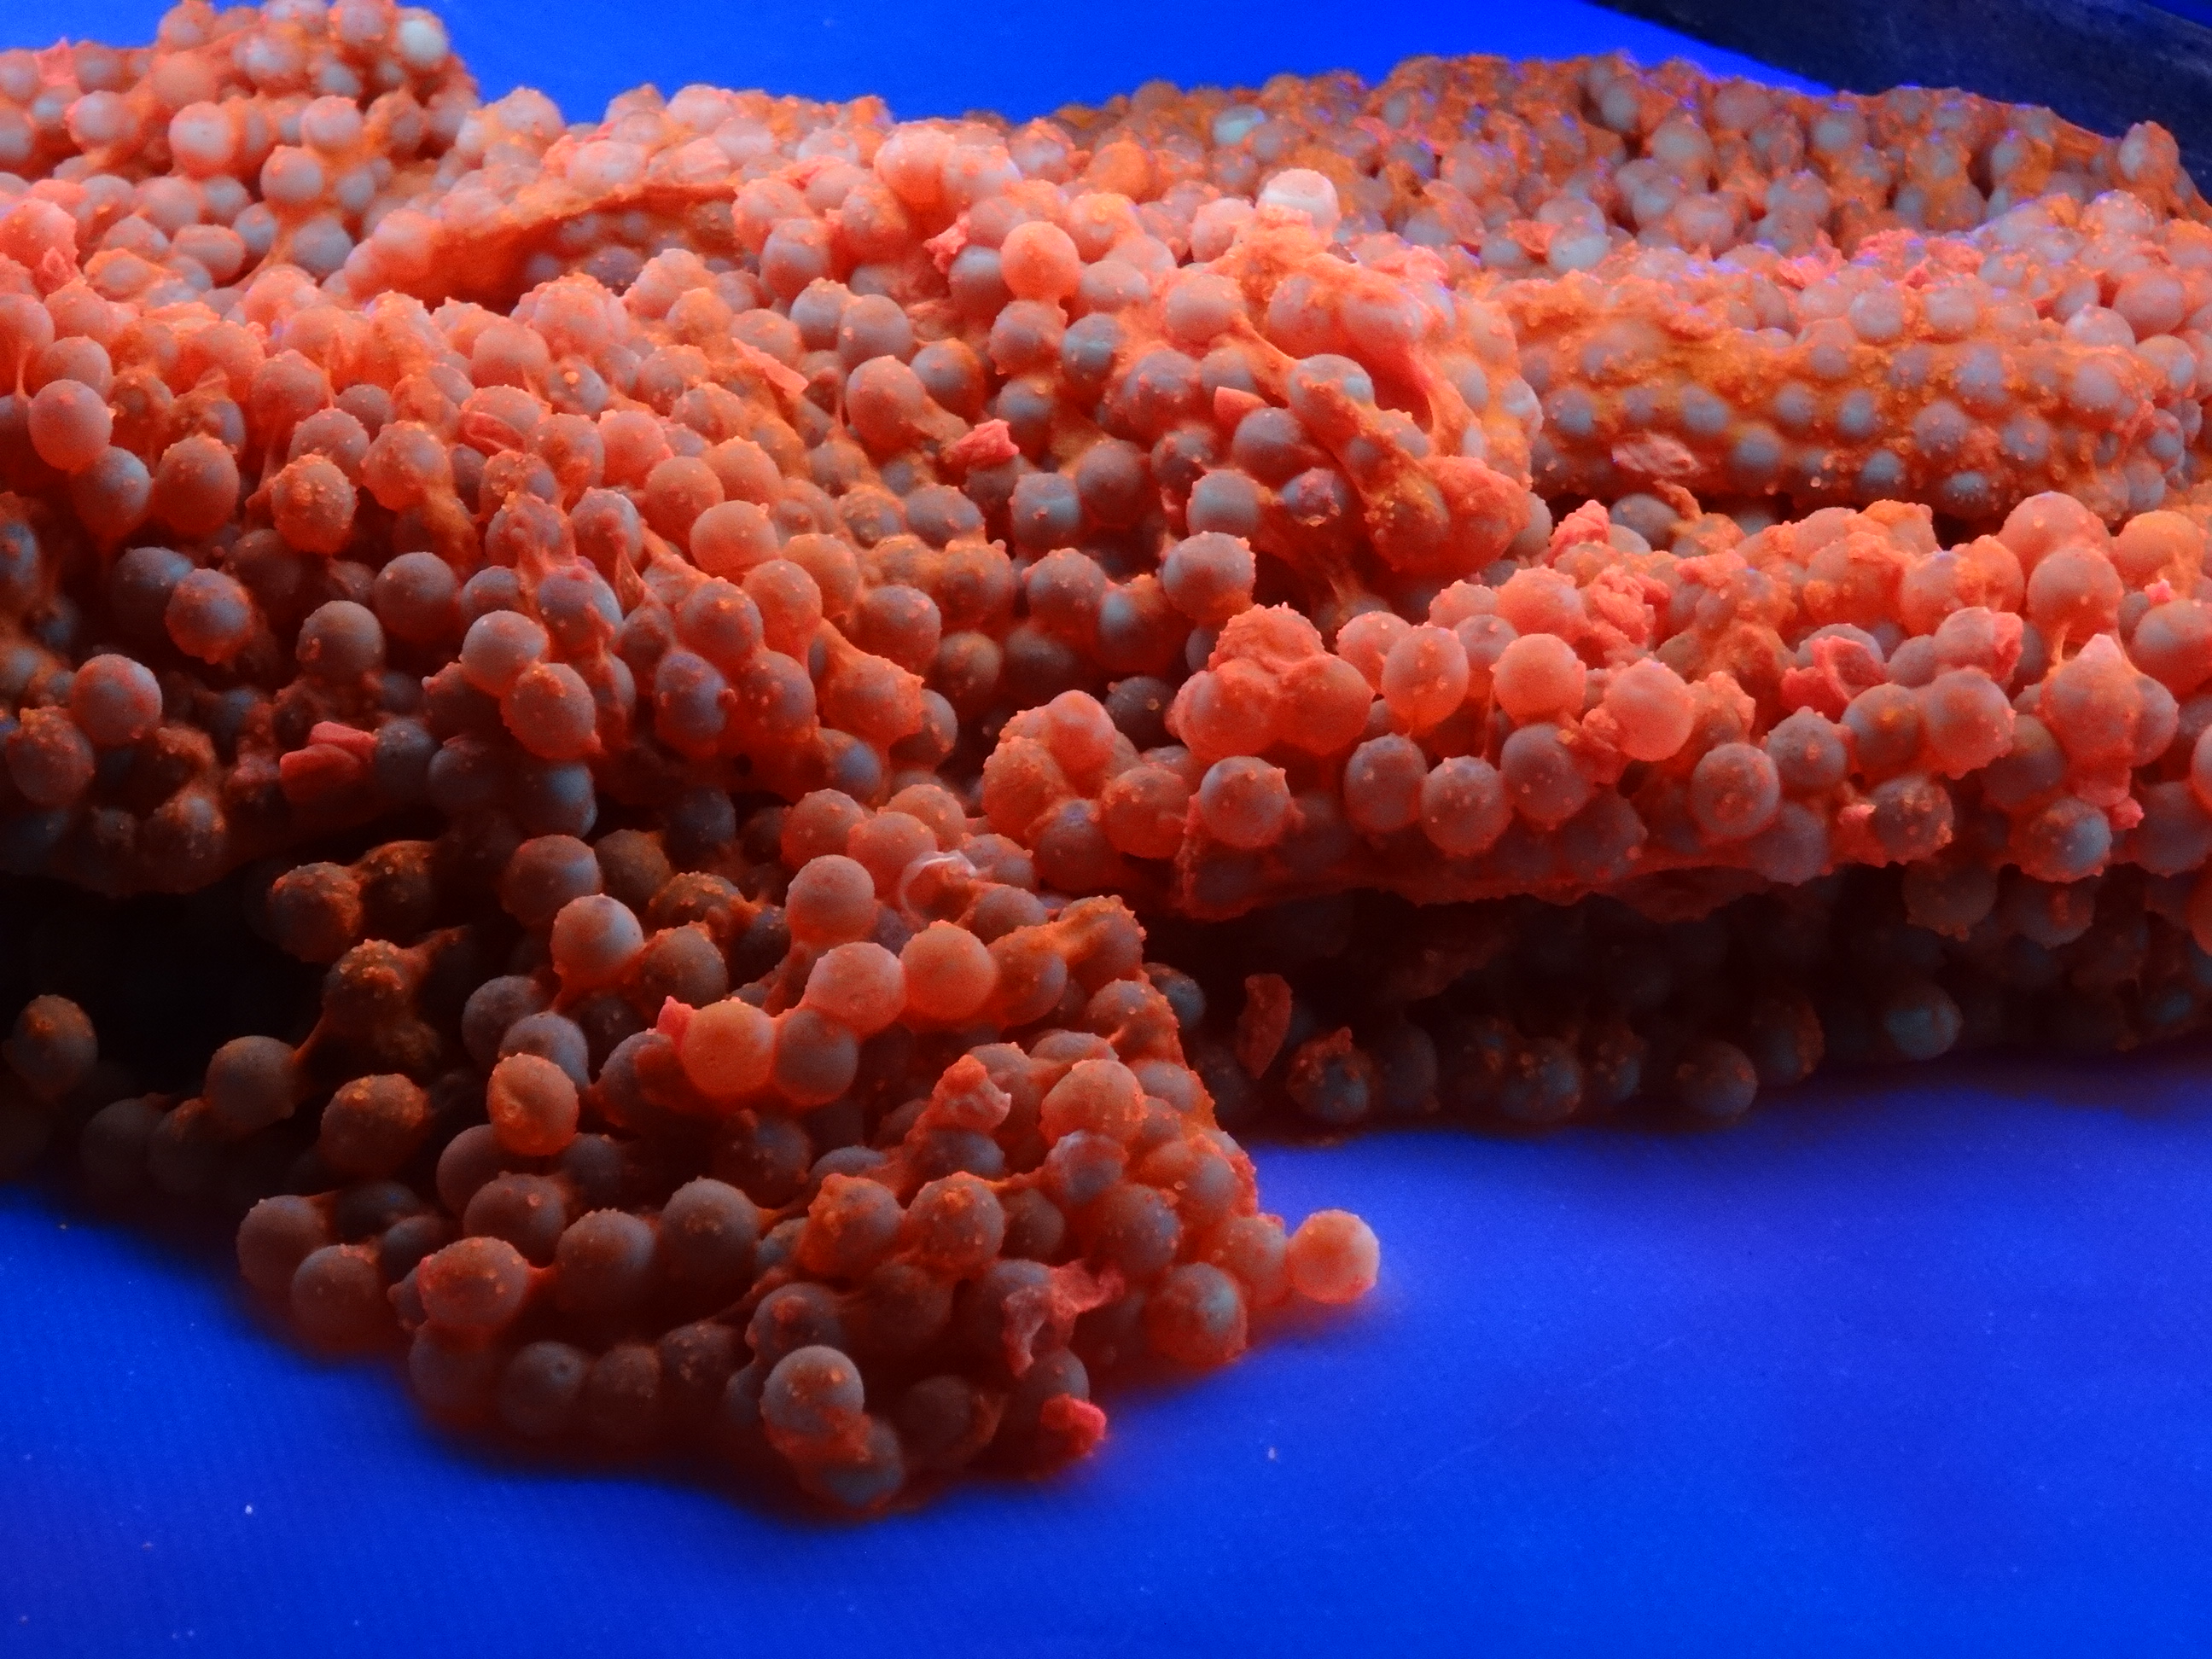
- Holy UV!
If you are wondering how strong the UV actually might be here is the finished product under a backlight. Yes, it’s more work to create eggs for any condition. Meanwhile, you now have eggs that conquer all conditions. Give it a try. It may be the game changer that you have been looking for.
Editor’s Note: Former fishing guide and full time firefighter, Duane Inglin is the host of Seattle’s Northwest Wild Country radio.